Brighten offers DocuSign via Loanapp, enabling you and your customers to quickly and easily get the home loan application forms electronically signed.
Key Benefits
- Boost Efficiency: Say goodbye to manual paperwork delays and accelerate the signing process.
- Cost Savings: Reduce printing, mailing, and storage costs.
- Mobile-Friendly: Sign documents on-the-go, anytime, anywhere.
- Environmentally-Friendly: Contribute to environmental sustainability by reducing paper waste, water, carbon emissions, and wood consumption.
- Enhanced Security: DocuSign meets stringent global security certifications, providing enterprise-grade security and compliance controls. Rest assured that your information and documents are protected.
How to Use DocuSign?
1. Nominate all parties to the application sent
If you want to use DocuSign, you need to nominate all parties to the application and obtain their forms electronically. If any party does not consent, you will have to use the traditional manual method.
To provide consent, go to the Summary tab, and select YES for the question “All Parties Agree to Electronic Signature”
2. Validate the Application and Generate the Print Forms prior to E-Sign
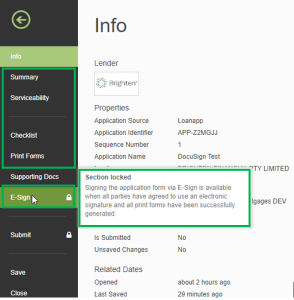
Go to the FILE tab. You will notice that the E-Sign section is locked when the application is not yet validated, and the print forms are not yet generated.
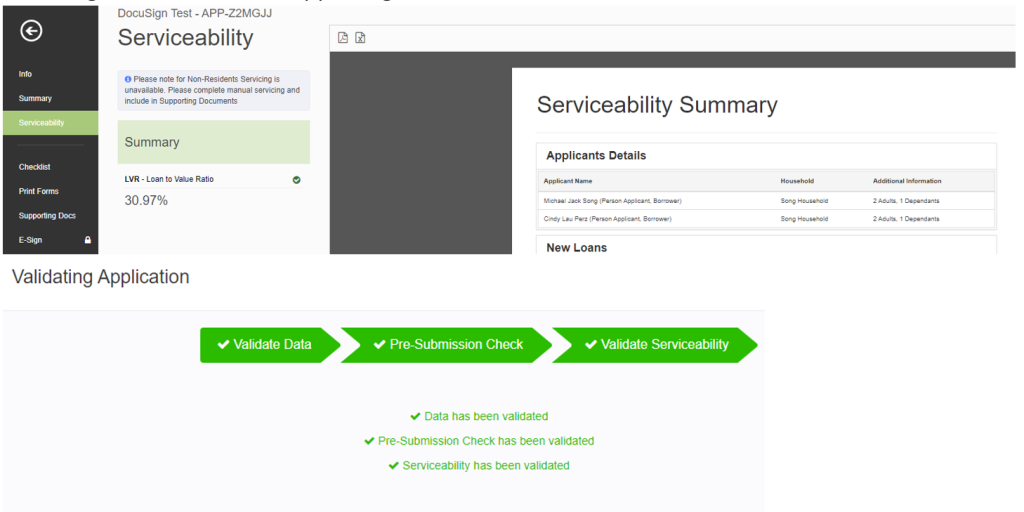
Click Summary. It should be validated without an error.
Click Serviceability. It should be processed without an error.
Please note that Non-Residents Servicing is unavailable. Please complete manual servicing and include it in the Supporting Documents.
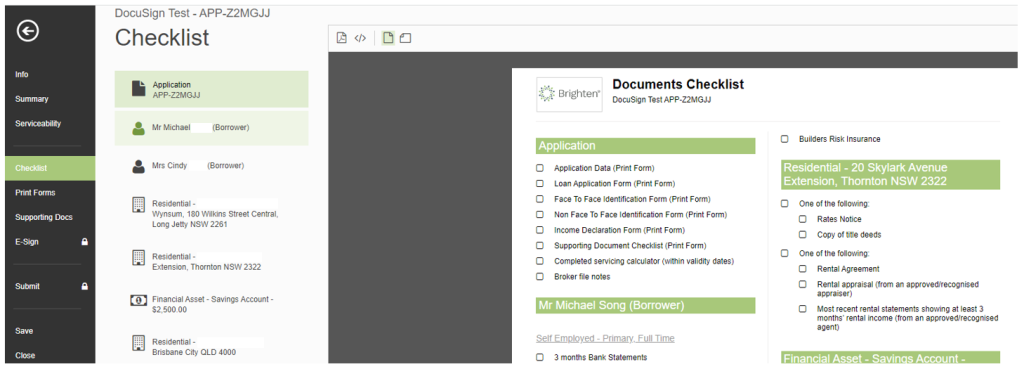
Click Checklist. The checklist will automatically be displayed.
3. Generation of Print Forms
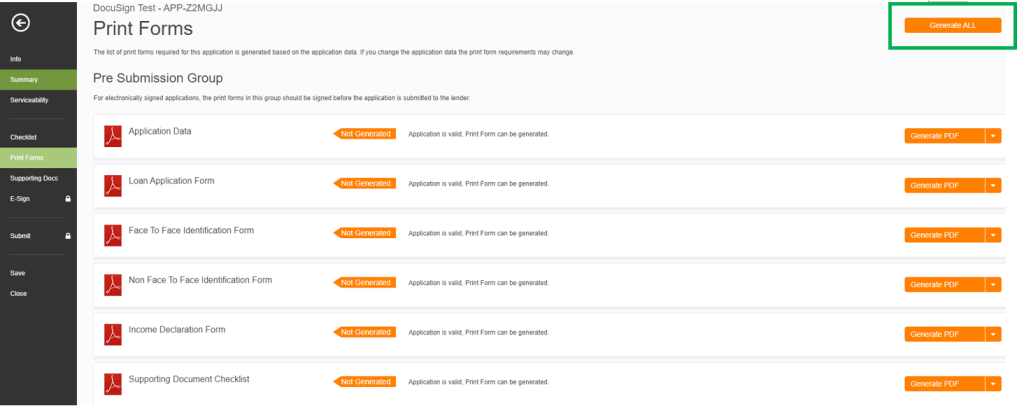
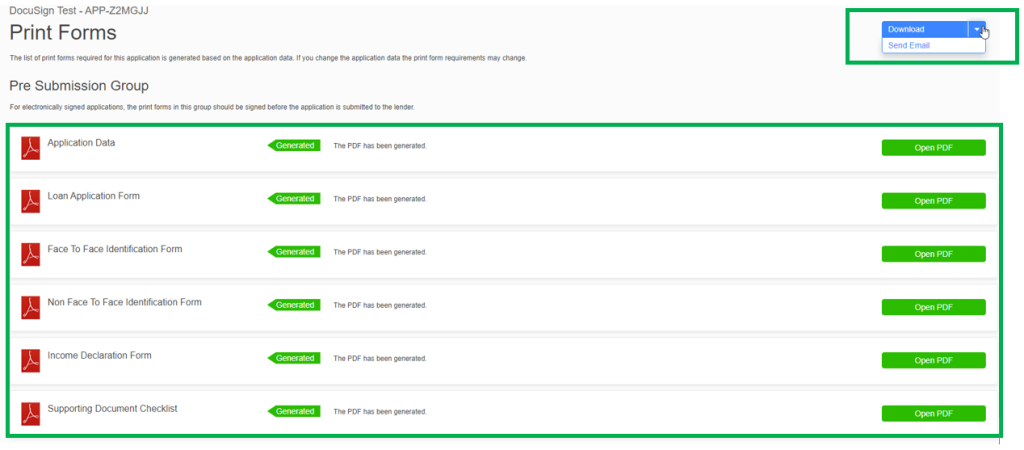
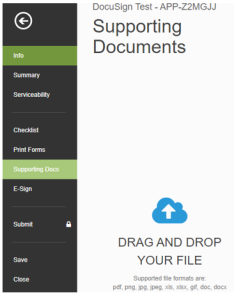
Click Print Forms and generate all the documents. You can then download the documents and upload them in Supporting Documents.
You can download or preview the documents by clicking Open PDF. And send them via email by selecting Send Email.
The email addresses of the applicants and loan writers can be found in the ‘TO’ (recipient) field. Select all the documents and click Send.
Click Supporting Docs to upload the documents. Alternatively, you can skip this and do it later once the application has been submitted. Please note that the submission of documents is separate, and the application must be submitted first before the documents.
4. Submission of E-Sign Request
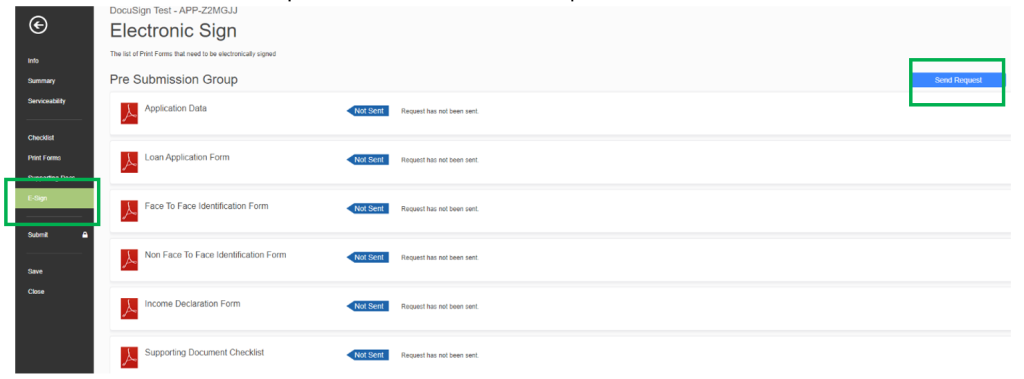
Once the application has been successfully validated and the Print Forms have been generated, the E-Sign section will automatically be enabled/unlocked.
- Click Send Request to start the validation process.
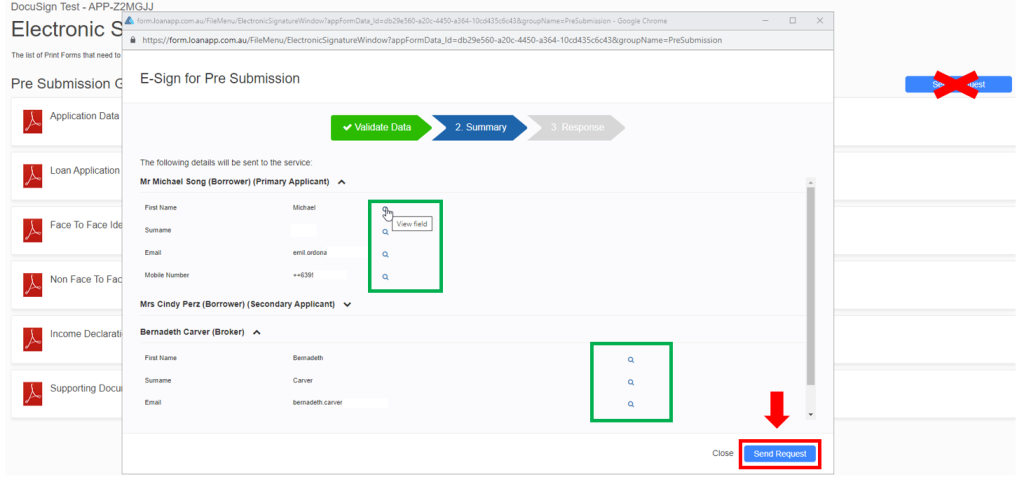
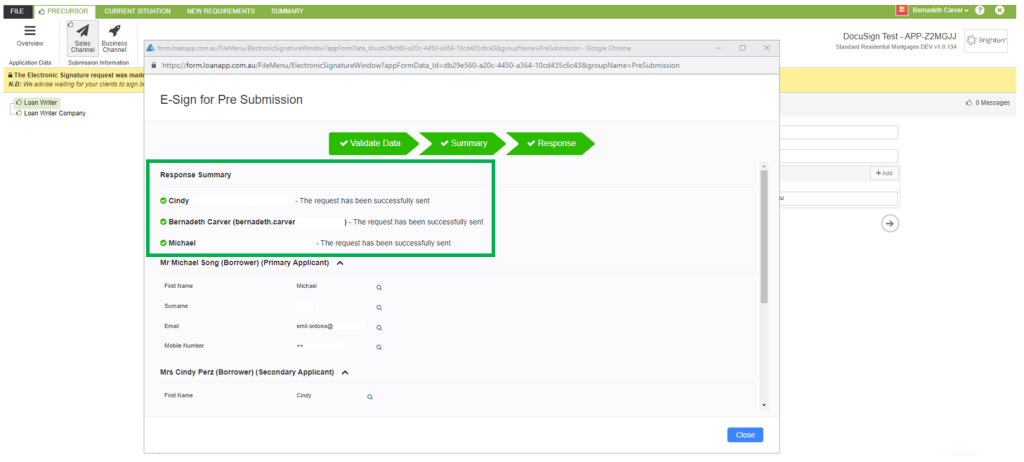
- In the E-Sign for Pre-Submission pop-up window, the Applicants’ and Broker’s contact details are displayed. Please ensure that these are correct (Name, Email Address, and Mobile Number).
- You may click the Search Icon to review the details.
- Click the Send Request button in the pop-up window to submit.
Once successfully completed, a Response Summary status will be displayed. Click Close to exit and return to the application. Please note that the application will now be locked as the forms have been distributed for signing.
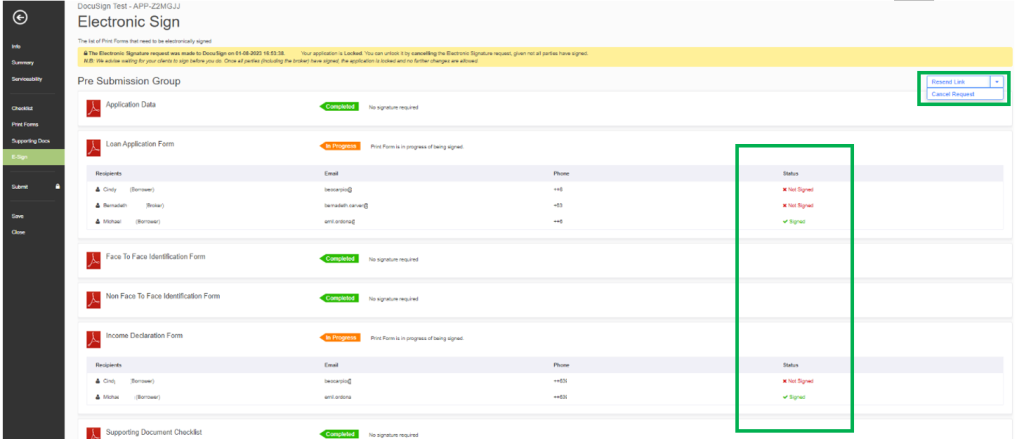
- To check the signing status, go back to the FILE tab and click E-Sign.
- You can cancel the request by clicking the Cancel Request button or resend the link of the request by clicking the Resend Link button.
- You will notice that the Submit section is still locked when all individuals have not yet accomplished the E-Signature.
5. Electronically Sign the Documents
Everyone who needs to sign the forms (i.e. you and your customers) will receive individual email invites to sign where required. The email invite will look like this:
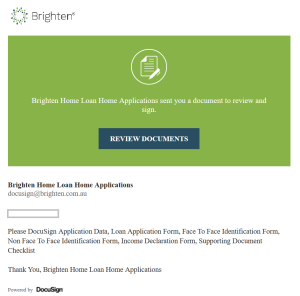
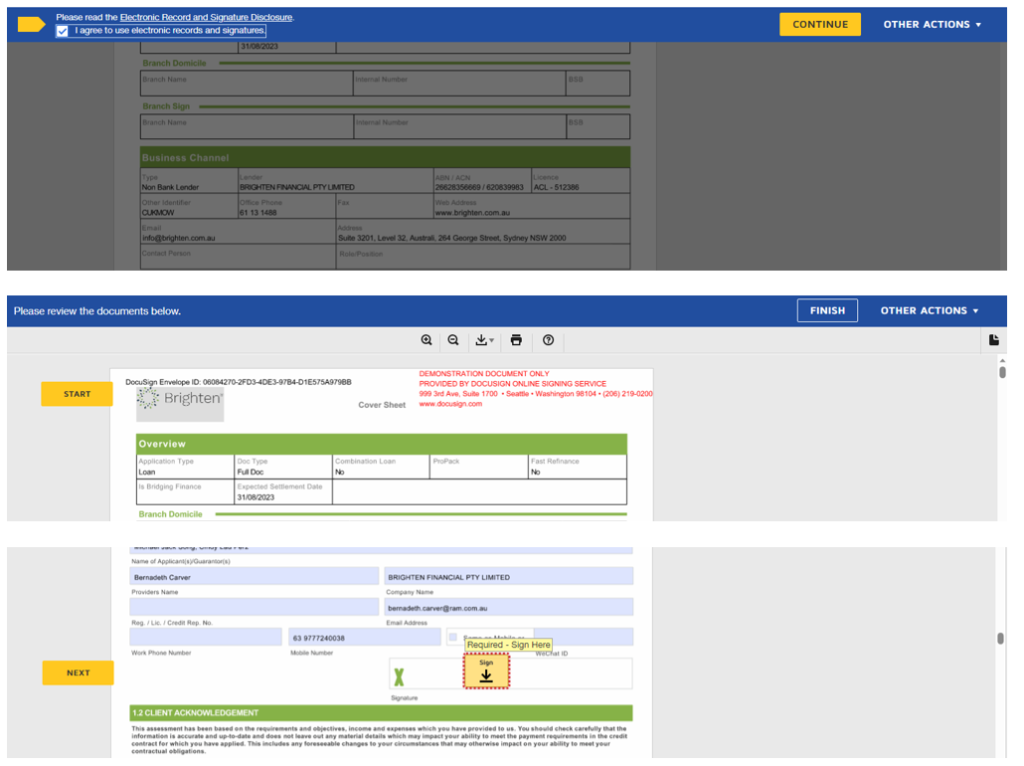
Click Review Documents and you will be taken to your Documents to sign. Agree to the terms and conditions, and then follow the prompts to sign your forms.
You may choose from Select Style, Draw or Upload for the type of E-Signature you prefer. Click Adopt and Sign to electronically sign the documents. Click Finish to submit.
6. Submit your application to Brighten
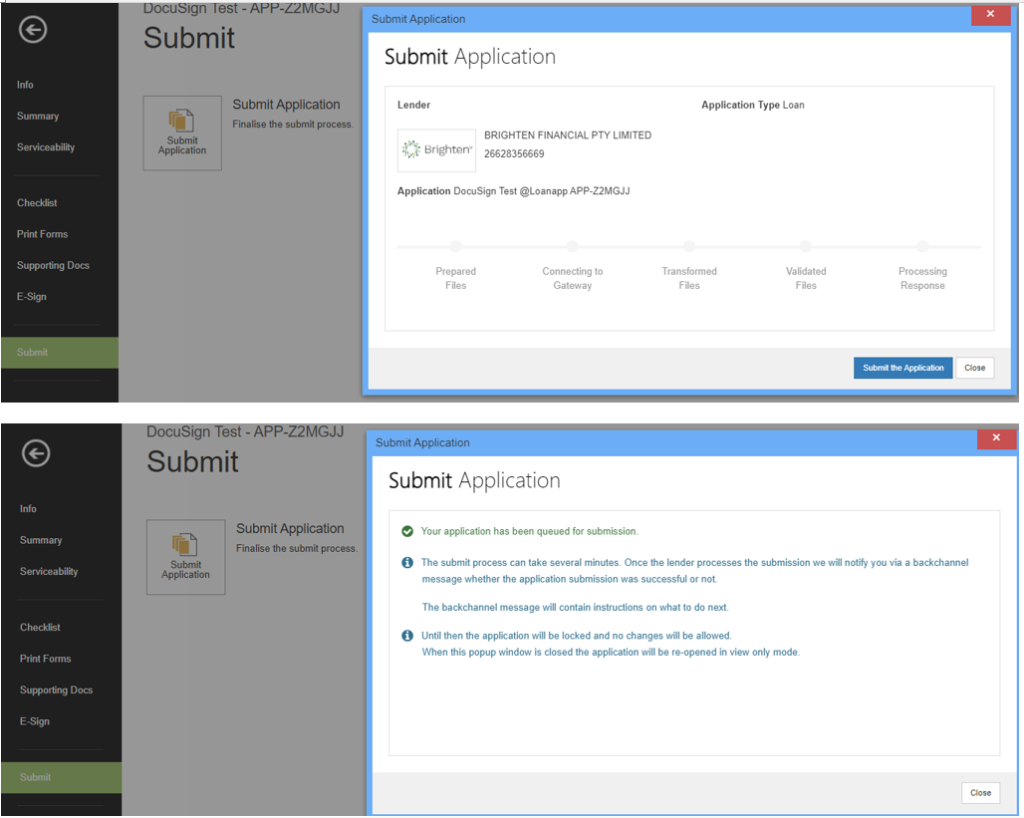
When all parties have signed, the E-Sign section will be ‘completed’, and the Submit section will unlock.
- Go to Submit and click Submit Application
- Then, click Submit the Application, and click Close to return to the application
Note that your signed forms will have automatically been sent to your Supporting Documents section.
To finalise the application, simply go through the normal Loanapp submit workflow.


